Since it was our first year at the farm, we needed winter storage for our hay. Even though there are thousands of trees here, we still need to find one with dollar bills for leaves. Thus began the build a barn from pallets project. We found some places locally that were giving/throwing away perfect pallets. Even better, we found a place where the pallets were mainly the same size.
This is particularly important when trying to build a structure from pallets. It makes the process significantly easier than having to match greens and yellows up to form a purple.
I needed to do some figurin about the size of what I needed to build. I wanted something that wasn't going to take forever but something that sufficed our current needs while accommodating our growing herd requirements. So I needed to get a grasp on what our hay requirements would be to get through the winter. This involved a little bit of math: area and volume calculations. Being a city boy, it also required me to understand the haystack configuration, which did modify the total number of bales we'd be able to stuff in the barn. That being said, I decided on an approximate 13.5' x 20' Lean-to / loafing shed/run-in horse shed barn. Pick your name. Basically, a three-sided barn with an opening in the front to allow for easy hay storage and removal. After crunching the numbers, by my calculations, I should be able to fit over 300 small-sized square bales--not including any space above the wall plate. We'll see how close or far away I am once everything is completed.
The second part of the first step, is site selection. A good location can take a significant portion of the pain out of the work. Unfortunately for us, we didn't have the ideal spot. It wasn't the worse but definitely was not the best. So we were required to level with 2x8x16 and 4x8x16 solid pewter slab pavestone.
Step 2:
Once the site was selected and the corners marked out, it was time to start putting the first pallets together. The way I accomplished this was to stand the pallets with their open ends facing down and up, placing two pallets side by side and drilling through each side of the pallet, and attaching with a 5/16" hex bolt. I choose to connect the pallets together with three bolts (Top, Middle, and Bottom). I would, however, suggest that you only connect the pallets together at the middle and bottom at this time and add the top bolt once you start the second layer. The reason is that when you add the second row of pallets, you will want to affix the second row to the first (bottom) row. This is most easily accomplished by sistering another board against both levels. (e.g., in the opening of the pallets, place the additional piece of wood so that half of it is on the upper level and half on the lower level). You can clamp that board in place, drill, and then bolt it together. If you already put the top bolt on the first level in, you'll have to take it out and drill a new hole. Waiting until you place the second level on only one hole, and you don't have to take anything out.

Here is a picture of how I fastened the pallets together
A couple more of the first level going up:

Step 3: "Leveling Up"
Once I got the first level up, attached and square, it was time to start getting the second level up. I found it's easiest to start in a corner and do a pallet on each side of the corner. This will help provide stability to the wall as you go. The pallets on the second level were attached the same way as the pallets were done on the first level. The only difference is the additional piece of wood I slide inside the pallet opening (the openings that face up) to be used to fasten the top and bottom levels together. Tip: put the piece of wood in before you put the second-level pallet on. It's easier to get the piece of wood in this way, rather than having to fit it in between the slats or dropping it in from the top. The other tidbit would be to not fasten the second level pallets together at the bottom. (Same reason for not doing the tops of the first level). Once the pallets were up, flush (as can be), and level, I clamped the connector wood in the position I wanted and drilled through. This step is probably going to require a longer drill bit because you are going through at least 3 pieces of wood at this point. Depending on the thickness of the connector piece, you could be drilling through as much as 5 to 6 inches or as little as 4. It will depend on the wood you have and the wood the pallets were built using.
Step 4: "Topping it Off"
Once the second level is up and secured, the next step is to put the top plates and any ridge beams on. For our barn, I choose to have an open front to allow for easy loading, unloading and access to our hay. This required a ridge beam/seat to span the opening. Since I was concerned about costs and structural load, I added an interior wall that split the opening. This allowed me to use lumber I could find at our lumber yard and not have to special order a 20' LVL beam. Instead, I was able to use two 4"x6"x12' pieces. I affixed the top plate and then affixed the 4x6 pieces to the top plate with strong tie brackets every foot or so.
The build is nearing completion. Thankfully. The following steps are to finish the front risers, then cut the rafters, and then install the roofing and siding. I will update as the progress continues.
In the meantime, if you are considering building a barn or a shed from pallets, here are things to consider that I have run into that have caused minor inconveniences to utterly driven me mad:
- Pallets are not the same size (I suspect there are no carpenters in pallet factories). Even if the two pallets have the same specified size, there will be variations. The variations manifest themselves in 1/4 + inch differences in width, height, and depth.
- The horizontal slates on pallets can be any piece of wood that can be cut to length. One pallet may have slates of different thicknesses. This will come into play when trying to get your pallet wall level and possibly when affixing sheathing.
- Beware of rebuilt pallets. Sure it looks alright. However, that rebuilt pallet may not be structurally sound. It may have had the load-bearing members doubled up in a sistering configuration to support the member that broke or rotted. This sistering configuration can cause issues when you bolt adjacent pallets together in your wall building.
- Be sure to have drill bits long enough. Nothing like being midstream of building your wall and being 1/4" short of being able to completely pre-drill your bolt hole.
- Take the time to level your wall pads (if you are not pouring an entire concrete pad or placing directly on the ground.
- Pallets are like irregular-sized lego pieces. They will fit together but they are probably going to require some manipulation since they are all different.


-Joe


The build is nearing completion. Thankfully. The following steps are to finish the front risers, then cut the rafters, and then install the roofing and siding. I will update as the progress continues.

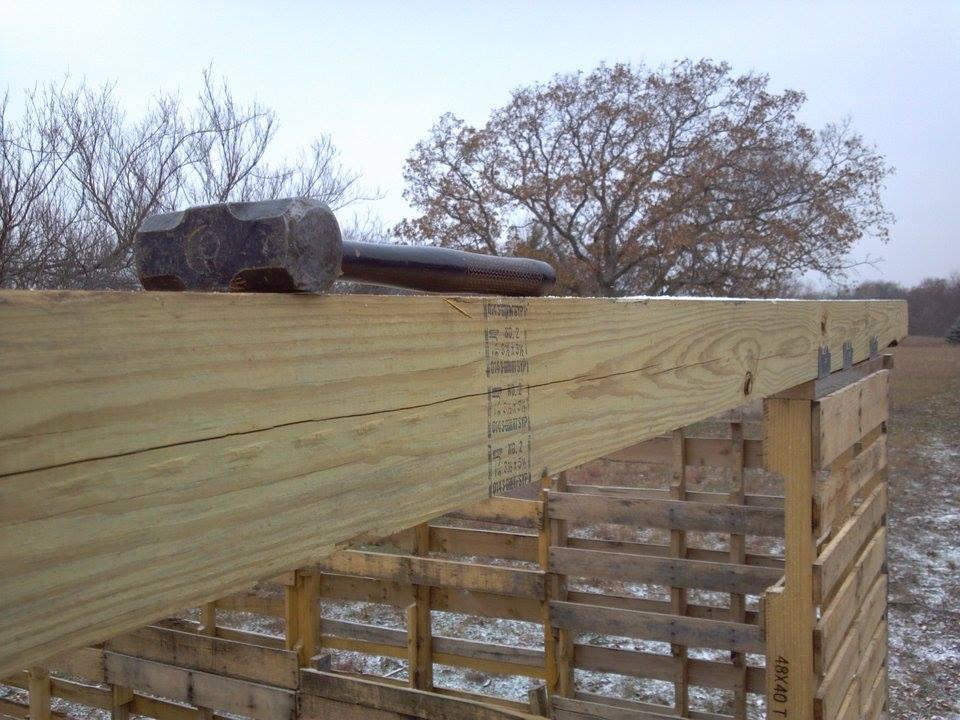
Here is the most recent shot of what has been completed.
In the meantime, if you are considering building a barn or a shed from pallets, here are things to consider that I have run into that have caused minor inconveniences to utterly driven me mad:
- Pallets are not the same size (I suspect there are no carpenters in pallet factories). Even if the two pallets have the same specified size, there will be variations. The variations manifest themselves in 1/4 + inch differences in width, height, and depth.
- The horizontal slates on pallets can be any piece of wood that can be cut to length. One pallet may have slates of different thicknesses. This will come into play when trying to get your pallet wall level and possibly when affixing sheathing.
- Beware of rebuilt pallets. Sure it looks alright. However, that rebuilt pallet may not be structurally sound. It may have had the load-bearing members doubled up in a sistering configuration to support the member that broke or rotted. This sistering configuration can cause issues when you bolt adjacent pallets together in your wall building.
- Be sure to have drill bits long enough. Nothing like being midstream of building your wall and being 1/4" short of being able to completely pre-drill your bolt hole.
- Take the time to level your wall pads (if you are not pouring an entire concrete pad or placing directly on the ground.
- Pallets are like irregular-sized lego pieces. They will fit together but they are probably going to require some manipulation since they are all different.
